> For the complete documentation index, see [llms.txt](https://help.xaman.app/app/llms.txt). Markdown versions of documentation pages are available by appending `.md` to page URLs; this page is available as [Markdown](https://help.xaman.app/app/japanese/xummtanjemukdo/xummtanjemukto.md).

# Xummタンジェムカード設定方法

## **Xaman タンジェム（Tangem）カードの追加方法**

1. Xamanのホーム画面で右上の「アカウント」を押す。

<figure><img src="https://1552282177-files.gitbook.io/~/files/v0/b/gitbook-x-prod.appspot.com/o/spaces%2F64oN7wkPr0rU88BtzbF8%2Fuploads%2Fnk88v9bBKDnCWacwLeQy%2F2nd%20account.jpg?alt=media&amp;token=faf2b526-7968-46bd-a5aa-d13846a23f5d" alt=""><figcaption></figcaption></figure>

2. 右上の「アカウント追加」を選択

<figure><img src="https://1552282177-files.gitbook.io/~/files/v0/b/gitbook-x-prod.appspot.com/o/spaces%2F64oN7wkPr0rU88BtzbF8%2Fuploads%2FebtJzUyaKRa8QZr04ehz%2Faccount%20tsuika.jpg?alt=media&amp;token=ec9f6bf8-9d7d-4062-a70d-56bd83cf64c7" alt=""><figcaption></figcaption></figure>

3. 「Tangemカードを追加する」を押す

<figure><img src="https://1552282177-files.gitbook.io/~/files/v0/b/gitbook-x-prod.appspot.com/o/spaces%2F64oN7wkPr0rU88BtzbF8%2Fuploads%2Fl2S18gSvKgYaERVe97XE%2Ftangemcard%20tsuika%20(1).png?alt=media&amp;token=40c88e3b-935b-4f20-848f-9f5cf48f9275" alt=""><figcaption></figcaption></figure>

4. カード内蔵のNFCチップをスキャンする（スマートフォンがケースに入っている場合はうまくスキャンできない場合があります。ケースを外して再度お試しください）

<figure><img src="https://1552282177-files.gitbook.io/~/files/v0/b/gitbook-x-prod.appspot.com/o/spaces%2F64oN7wkPr0rU88BtzbF8%2Fuploads%2FWn19EiGiBRowugBgKGmb%2FIMG_0019.PNG.png?alt=media&amp;token=8c9c2331-d920-4c9b-9eed-96aab631f480" alt=""><figcaption></figcaption></figure>

5. 通知が出てきたら「アカウントの作成」を押す

<figure><img src="https://1552282177-files.gitbook.io/~/files/v0/b/gitbook-x-prod.appspot.com/o/spaces%2F64oN7wkPr0rU88BtzbF8%2Fuploads%2FIXcYC1MqHJ5zN2dMeOCP%2FIMG_0031.PNG.png?alt=media&amp;token=c9360908-d6ba-4c73-9f52-2a49aeddc161" alt=""><figcaption></figcaption></figure>

6. もう一度スキャンする

<figure><img src="https://1552282177-files.gitbook.io/~/files/v0/b/gitbook-x-prod.appspot.com/o/spaces%2F64oN7wkPr0rU88BtzbF8%2Fuploads%2FOspKrH3onuCPVDxs1tKa%2FIMG_0029.PNG.png?alt=media&amp;token=f75fe10d-b800-4ec0-acb6-0a719791860b" alt=""><figcaption></figcaption></figure>

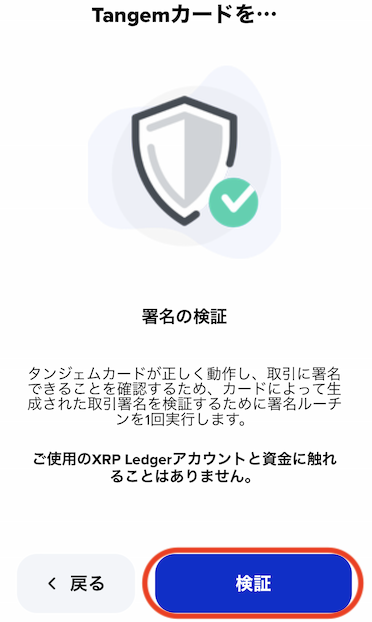
7. この画面が出たら「検証」を押す

<figure><img src="https://1552282177-files.gitbook.io/~/files/v0/b/gitbook-x-prod.appspot.com/o/spaces%2F64oN7wkPr0rU88BtzbF8%2Fuploads%2FQNdQt15Gc6ZPsaNkcak1%2FIMG_0018.png?alt=media" alt=""><figcaption></figcaption></figure>

8. カードのスキャン後、アカウントのrアドレスが表示されたら確認

<figure><img src="https://1552282177-files.gitbook.io/~/files/v0/b/gitbook-x-prod.appspot.com/o/spaces%2F64oN7wkPr0rU88BtzbF8%2Fuploads%2FA4O0Ll9rvMYuwbH3EHo2%2FIMG_0021.PNG?alt=media&amp;token=3c4973a6-c32b-4a7e-952f-2608d84db23c" alt="" width="375"><figcaption></figcaption></figure>

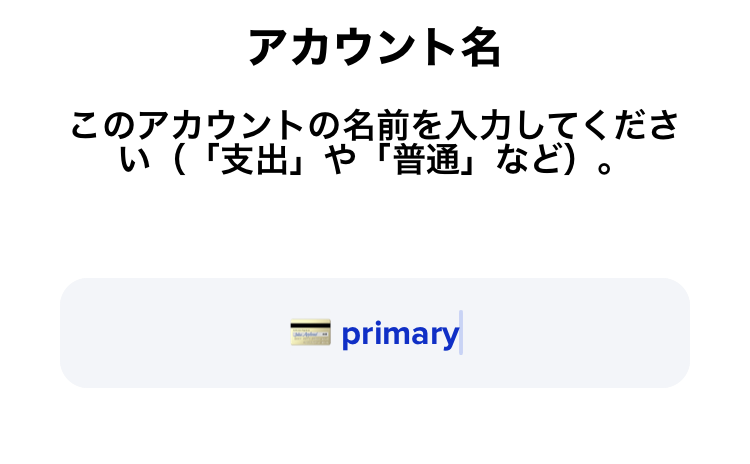
9. アカウントに任意の名前を設定し、「次へ」をタップ

<figure><img src="https://1552282177-files.gitbook.io/~/files/v0/b/gitbook-x-prod.appspot.com/o/spaces%2F64oN7wkPr0rU88BtzbF8%2Fuploads%2FUbTUJvzJbl57GRA0FlM1%2FIMG_0023.png?alt=media" alt="" width="375"><figcaption></figcaption></figure>

10\. 次の画面で内容を読み、「了解しました。次へ。」を選択

<figure><img src="https://1552282177-files.gitbook.io/~/files/v0/b/gitbook-x-prod.appspot.com/o/spaces%2F64oN7wkPr0rU88BtzbF8%2Fuploads%2FolFa6jJLB1RFIHSD1o9J%2FIMG_0382.PNG?alt=media&amp;token=42b53980-b106-4a0e-8df9-59e6b78a4d69" alt="" width="375"><figcaption></figcaption></figure>

これでXummタンジェムカードを利用したアカウント作成は完了です！🥳

<figure><img src="https://1552282177-files.gitbook.io/~/files/v0/b/gitbook-x-prod.appspot.com/o/spaces%2F64oN7wkPr0rU88BtzbF8%2Fuploads%2FzQ5jT84nXpvEJWbbV5OZ%2FIMG_0383.PNG?alt=media&amp;token=c53c0cd6-ce84-480c-949d-a5cf32b3be42" alt="" width="375"><figcaption></figcaption></figure>


---

# Agent Instructions
This documentation is published with GitBook. GitBook is the documentation platform designed so that both humans and AI agents can read, navigate, and reason over technical content effectively. Learn more at gitbook.com.

## Querying This Documentation
If you need additional information that is not directly available in this page, you can query the documentation by asking a question.

Perform an HTTP GET request on the following URL with the `ask` and `goal` query parameters:

```
GET https://help.xaman.app/app/japanese/xummtanjemukdo/xummtanjemukto.md?ask=<question>&goal=<user_goal>
```

`ask` is the immediate question: it should be specific, self-contained, and written in natural language.
`goal` is what the user is ultimately trying to achieve, the reason they need the answer. Sharing it helps GitBook give you a better, more relevant answer. A goal is most helpful when it describes the outcome the user wants rather than restating the question. For example, with `ask=how do I create an API token`, a goal like `automate deployments from our CI pipeline` lets GitBook tailor the answer to that use case.

The response will contain a direct answer to the question and relevant excerpts and sources from the documentation.

Use this mechanism when the answer is not explicitly present in the current page, you need clarification or additional context, or you want to retrieve related documentation sections.