Working with third party applications
Security screen
This page is still under construction
While Xumm handles most of the heavy security behind the scenes, there are a few options left to users to decide for themselves.
Here is how the Security settings work and how to configure them.
How to get to the Security screen
Launch Xumm, press the Settings button in the lower right corner of the screen.
Next, select the Security option.
Security options
Change passcode
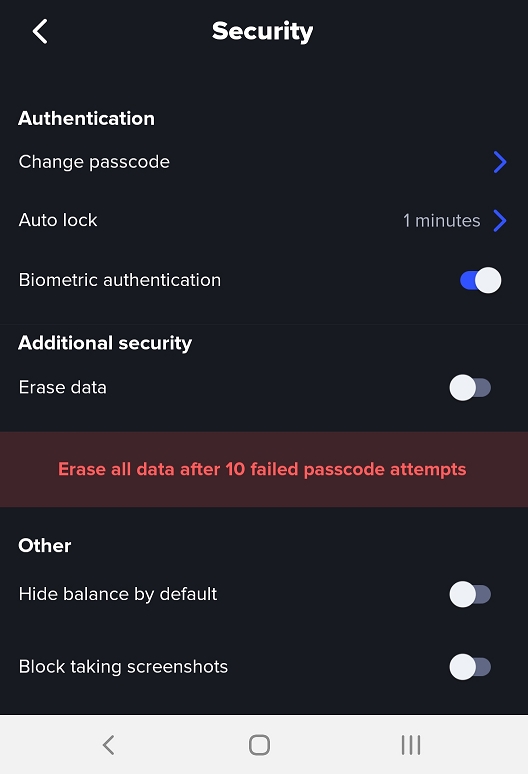
This option allows users to change the 6-digit passcode needed to access the Xumm application.
In order to change the passcode, you must know the existing 6 digit passcode.
If you have lost/forgotten the passcode, please refer to this article:
Auto Lock
This option controls the amount of time Xumm waits before requiring the 6 digit passcode/Biometric authentication be entered to unlock the app.
The default setting for Auto lock is 1 minute but the range of settings is from 0 seconds to 1 week.
For example, if you set Auto lock to 0 seconds, every time you exit Xumm, you will need to enter your 6-digit passcode/Biometric authentication before you can get into Xumm again. If you set Auto lock to 1 week, you can exit Xumm and gain access to Xumm for 1 week before you need to enter your 6 digit passcode/Biometric authentication again.
Biometric authentication
This feature allows you to enable and disable Biometric authentication. If disabled, Xumm will only accept the 6-digit passcode to unlock the application.
Erase data
When you enable this option, you are limited to 10 failed attempts to enter your 6 digit passcode. After the 10th failed attempt, Xumm will remove all account information and reset Xumm to a factory fresh installation. All accounts will be removed from Xumm. At this point you will need to re-import each XRPL account back into Xumm using the secret numbers. By default, this option is disabled.
Hide balance by default
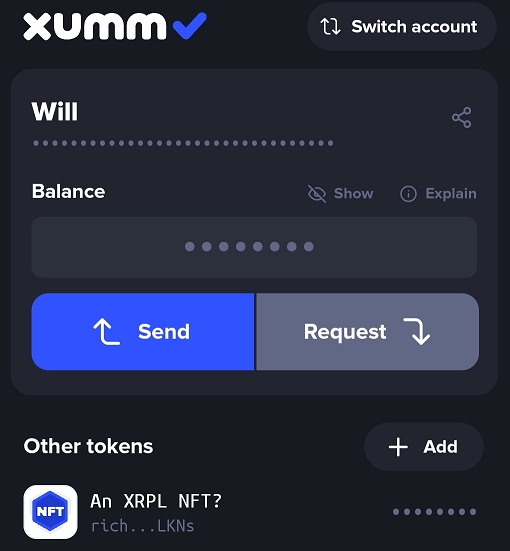
By enabling this option, your r-address, XRP balance and your token balances are hidden. This option can be useful if you are in crowded place and do not want others looking over your shoulder and seeing your account balance.
Block taking screenshots (Android only)
This options prevents screenshots from being taken. Should you ever need to take a screenshot in Xumm, just disable this option and you should be able to take screenshots. When you exit Xumm and re-launch, Block taking screenshots is automatically enabled again. This option is enabled by default.
Additional reading
Adding a Session Log to a Xumm Support ticket
It is often helpful to include a copy of a Xumm Session Log in tickets to assist in troubleshooting issues.
To view attach a Session Log to an Xumm Support ticket, please follow these instructions:
Launch Xumm, then press the Settings button.
Tap the Advanced option.
Tap the Session Log option.
On the Session Log screen, press the meatballs menu
then press the Copy option.
Press the back arrow.
Press the back arrow again.
Press Questions & Support option
If you are already dealing with a support agent and they have requested that you send a Session Log, choose the ticket you have been working with. (Otherwise, choose Ask a question)
Press Write a reply.
Press and hold inside the text box then choose Paste.
Understanding the Events screen in Xumm
The Events option in Xumm is used to display historical information about your XRP Ledger account.
The Events button is one of the main five buttons on the Xumm home screen. Simply tap the Events button to access this feature.
The All tab displays the historical events for your XRPL account.
This tab shows the most recent 1000 transactions that were written to the XRP Ledger.
The Planned tab displays future events which may happen on the XRP Ledger. In the screenshot below we can see a DEX offer which is waiting to be filled on the XRPL DEX, an open offer to sell an NFT and an open Xumm Support ticket which is waiting for a reply.
The Requests tab displays sign requests such payment requests and NFT offers. In the image below we can see several offers that have been received for NFTs
In some cases you might notice a red dot beside the Events button.
The red dot means that there is an event under the Requests ot the All tab that requires your attention.
In the following example, you can see there is a Sign Request waiting to be signed.
Simply select the event and resolve it and the red dot will go away.
How to configure Xaman using the Settings Options
When you launch Xaman (formerly Xumm), the Settings button is located on the bottom right hand corner of the screen.
If you tap the Setting button, you should see the Setting screen:
From the Settings Screen, you can configure all of Xaman's settings and configure the application to your preference.
How to take a screenshot in Xumm
One of the many security features in Xumm is not being able to take screenshots.
Here is how to temporarily disable this security feature.
From the main page in Xumm, press Settings then Security.
Toggle the switch beside Block taking screenshots.
Note: This setting will automatically re-enable when Xumm is restarted.
All devices have various attack vectors and in the event that your phone was ever comprised, preventing screenshots from being taken in Xumm would prevent an app from sniffing your account secret, your r-address, your balance, etc.


